
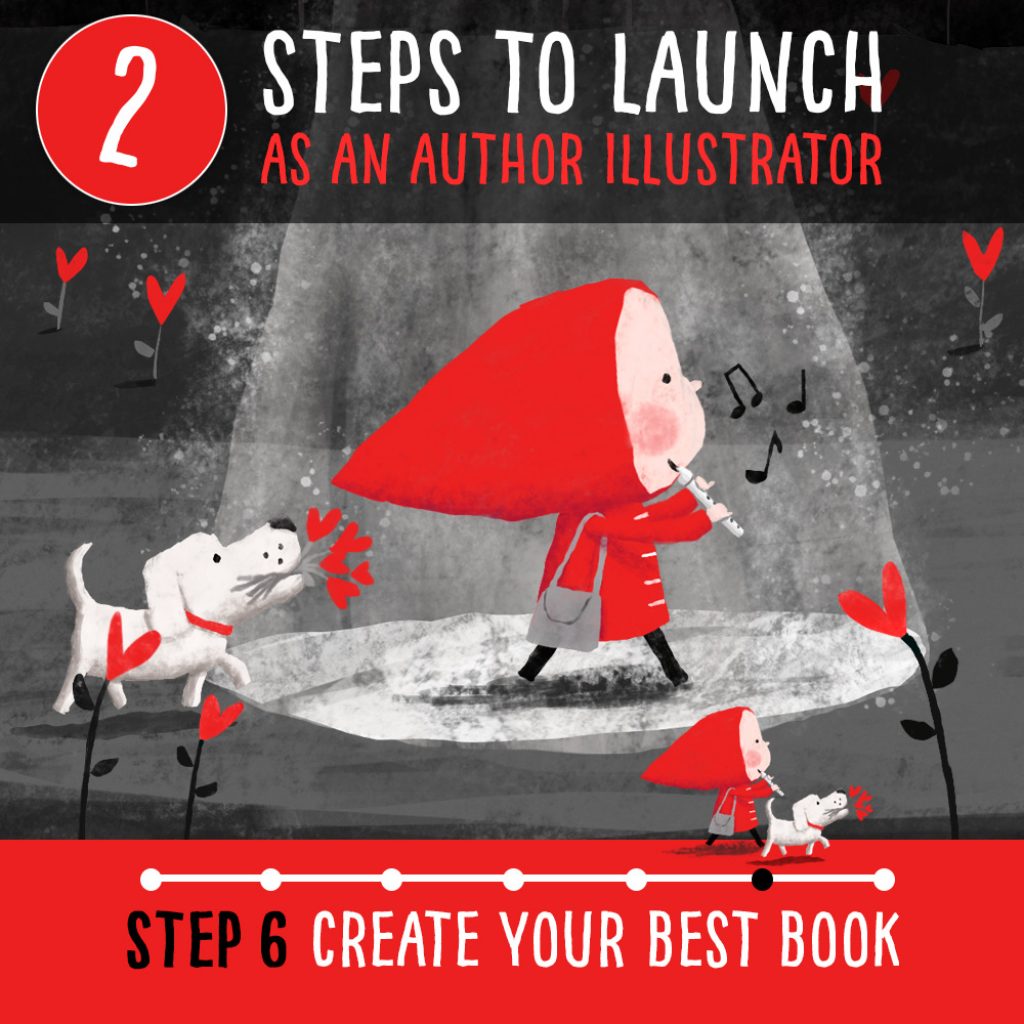
7 steps to become an author illustrator – Step 6: How to create the best book
From my experience, the best possible book comes from respectful collaboration and joint input from both you and your publisher
- How much should I take my editor’s suggestions on board?
- Steps of the picture book creation process
- Creation process & challenges of Red and the City
How much should I take my editor’s suggestions on board?
Assuming you have an experienced editor, do take on board what they have to say, even if it’s sometimes painful. Take time to consider it. Take a step away and pretend you’re reading someone else’s book. Maybe suddenly it makes more sense.
If you’re still not in agreement, discuss it with your editor. A good editor will respect and listen to what you have to say. And generally, together, you will find an even better solution that makes everyone happy.
And whilst you should be very open to what they have to say – after all they want to help you make it the best possible book – also don’t be too shy or too lazy to stand up for your book and what you’re trying to get across. As your book’s creator you likely know it better than anyone else and it is therefore your responsibility to explain your reasoning and work hard to find the very best solution together with your editor.
Also if in doubt, your agent, if you have one, can be an excellent resource to call on for another opinion.
Specific steps of the picture book creation process
From 1 to 12 it takes about a year …
- Sorting the structure and manuscript
- Sorting the storyboard / page flow and artwork roughs
- Making the final interior artwork
- Creating the cover, title page and endpapers
- Setting up the final print files
- Digital proof / blad for book fairs
- Making colour corrections
- Wet proofs
- Making further colour corrections if necessary
- 2nd round of wet proofs if necessary
- Printing of the actual book (including in all the languages that co-editions have been sold for)
- Finally holding an advance copy of your book in your hands
It then takes about another 3 months before your book is published.
Generally, picture book deadlines revolve all around the two major book fairs, Frankfurt Book Fair every October, and Bologna Children’s Book Fair in March/April, as well as printer, delivery and publication schedules. Because of this deadline driven environment the creation process can get very stressful.
People often think making picture books is a doddle. Far from it. I have previously worked in very fast-paced TV, marketing & design roles and normally excel under pressure, but so far – also being the perfectionist I am – I have found making picture books overall the most challenging and relentless, but also the most fulfilling, job I’ve ever done.
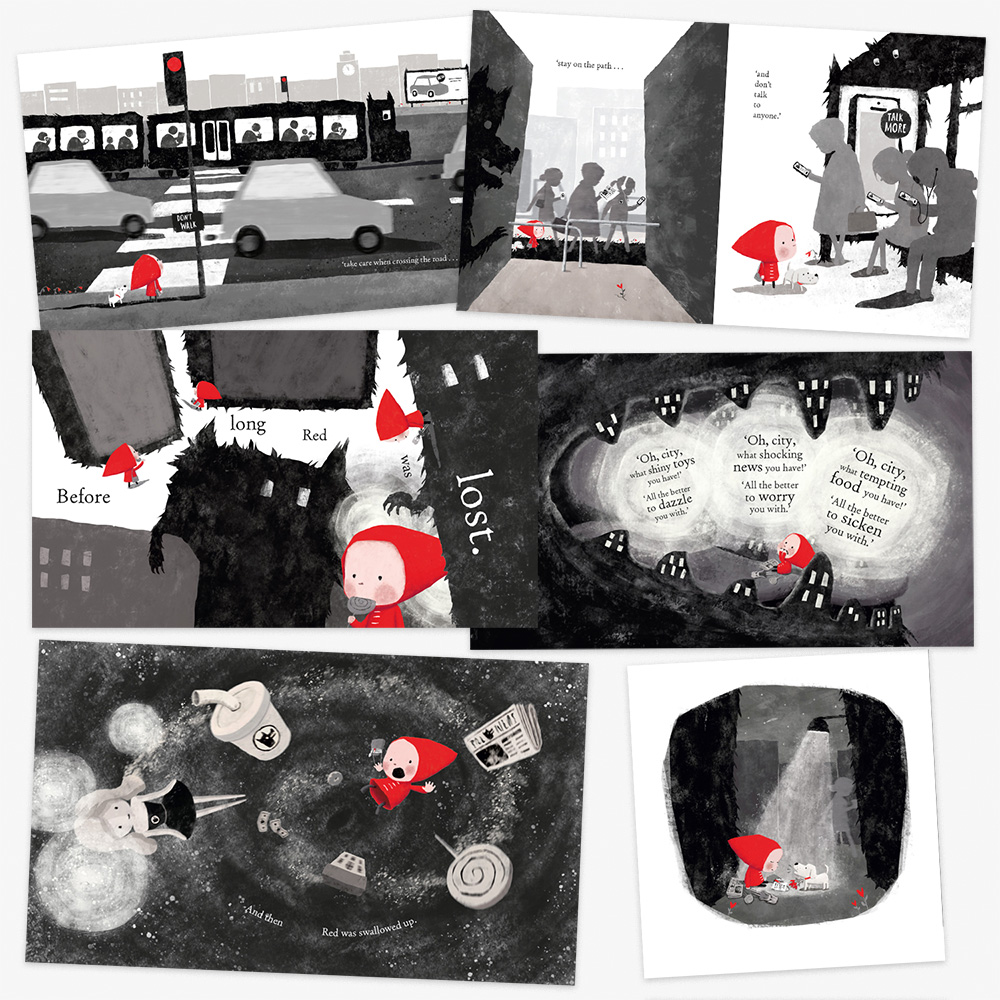
Specific creation process & challenges of Red and the City
Before starting the editing process, I laid out what I wanted to get across with the book
Because I wanted to convey a lot of deeper / layered meaning in Red and the City, before setting to work turning my rough dummy into the best possible book together with my publisher Oxford University Press, I wrote down bullet points of what I ideally wanted to get across on each spread.
I still believe this was one of the best things I could have done for the book. My fantastic editor, Peter Marley, was really interested in helping me convey these messages better, despite the fact that they weren’t your typical picture book material. These spread notes gave us a great roadmap to keep referring to whilst working on the book to make sure we weren’t going off path (pun intended) too much.
Structure, text & artwork refinements
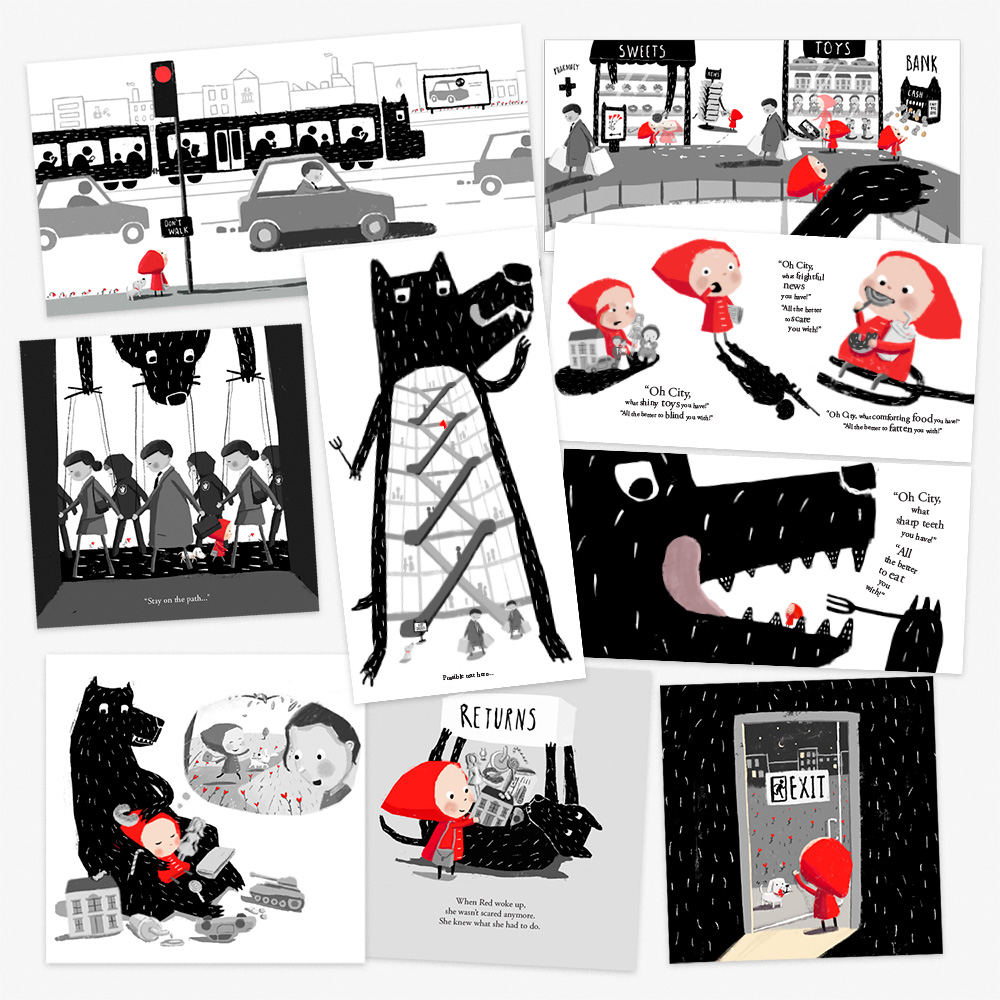
Because the structure of Red and the City follows an existing fairytale text there wasn’t too much work we had to do on my proposed text, and my storyboard / page flow was also already in good shape. We mainly worked on the artwork, and some of the wording, to make sure my deeper intended messaging was really coming through.
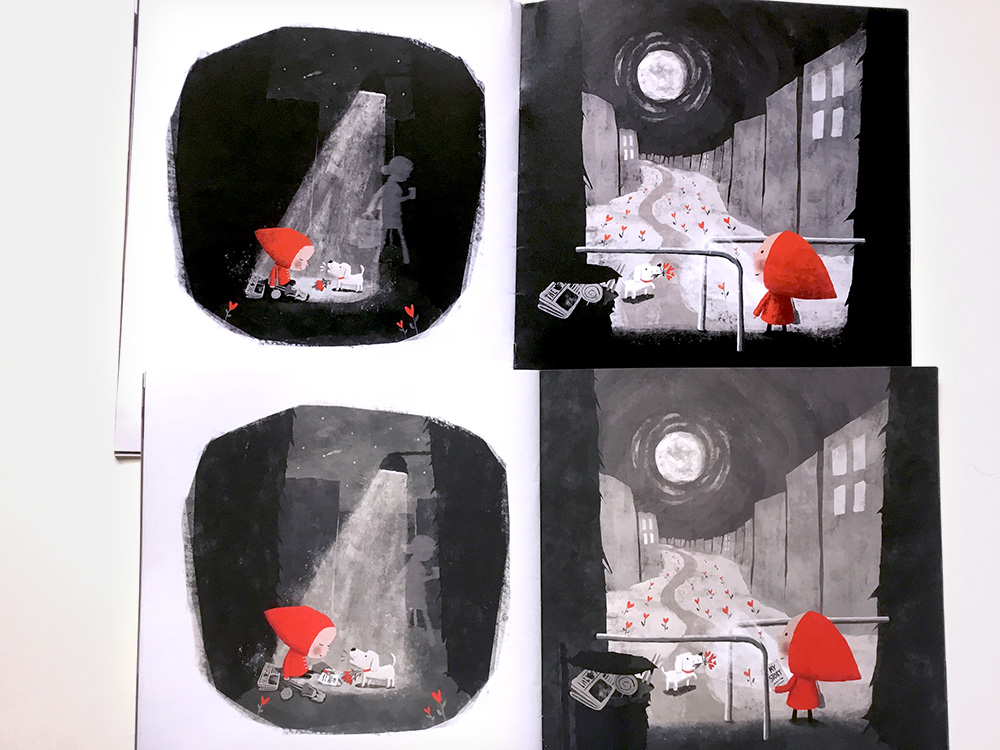
I was delighted when Pete said that I could be bold with showing that the wolf is the city/system and that the wolf can manifest itself in lots of different things throughout the city. Following that, I just loved going crazy depicting the wolf, whether it’s in the bus station that watches what the people are doing on their smartphones or in the cash point with the sharp teeth that promises a loan with huge interest rates. Suddenly, I really saw the wolf everywhere! And think about it, the wolf really does hide everywhere in our modern lives…
The main challenge
One thing that was challenging was trying to make sure we get all my intended deeper meanings and atmosphere from my roughs across whilst still making the book accessible, and not too scary, for younger children.
With both of us liking to explore different approaches before settling on the right one, we went through lots and lots of different iterations of possible artwork for each spread and also actual artwork style. In a way we almost made various different books instead of one. In the end we returned to more of the atmospheric feel and layouts from my initial roughs, but with many more details to convey the deeper messages and also make it a little less scary.
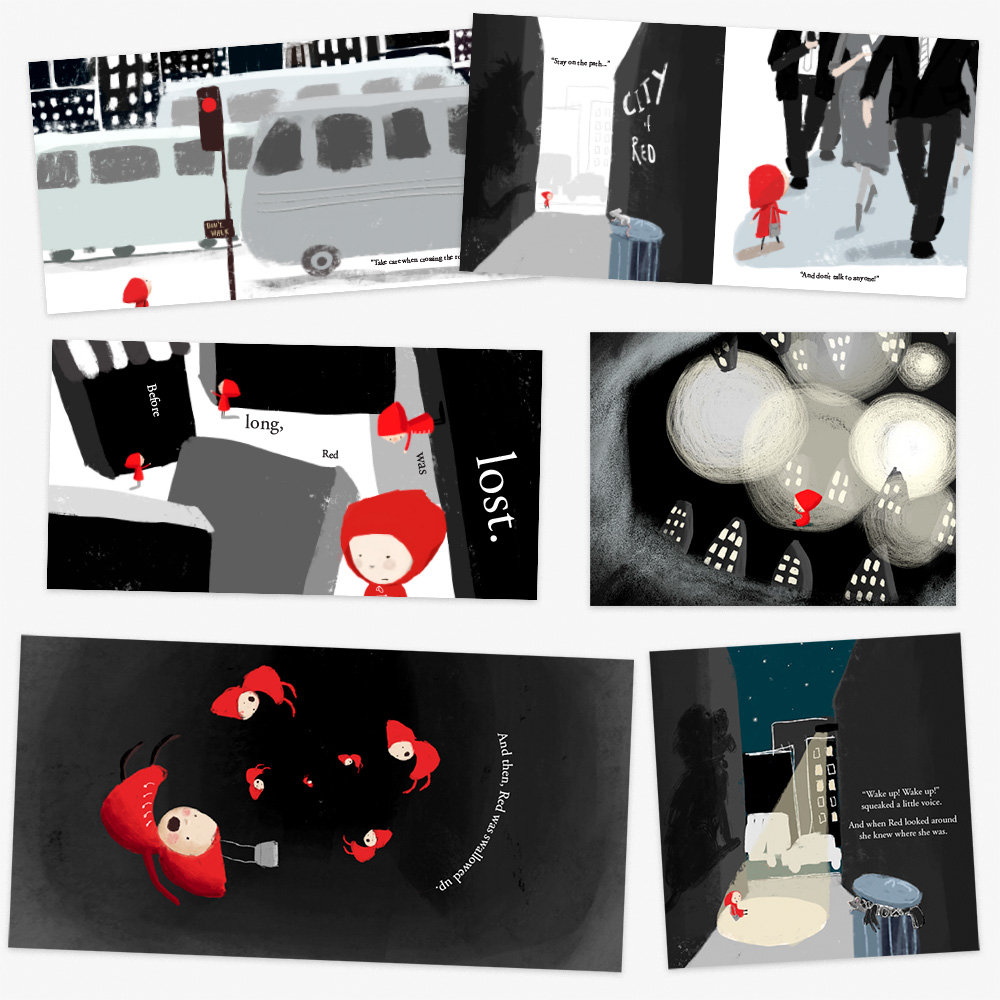
How Woody was born
Also some publishers had expressed concern over Red going into the city on her own, which is why, following a suggestion from my agent and another publisher I’d met, we introduced Woody. Initially, I couldn’t see that working at all – after all, Little Red Riding Hood goes through the wood on her own – but when my editor started talking about this cute little dog wagging his tail and doing this and that, I was suddenly sold. I also immediately saw in my mind what the dog should look like and what his name should be. And now I can’t imagine the book without Woody. It’s a great example of how the different inputs from your agent, other publishers you’ve met, your editor and you can really lead to the best results.
Technical challenges
A challenge, which I wasn’t aware of, is that black and dark grey artwork is notoriously hard to reproduce well in print on uncoated paper whilst maintaining textures and details. So after I saw the digitally printed proof (also called digital proof or blad) of the book, I had to go and lighten and re-setup each image as well as work closely with the production team to make sure my artwork was reproduced as intended.
Also as I had put a lot of reversed-out handwritten and typed text (white text on black backgrounds) into the artwork, it took me and the production team an extra long time to make all the final print files as this requires a special setup since picture books need to be printable in lots of different languages at the same time.
Overall, I’d be lying if I said the whole process wasn’t very hard, round-the-clock work. But trust me, it’s all worth it when you finally hold your first finished picture book in your hands!
I can’t wait to finally let Red and Woody loose into the world now, to hopefully delight and inspire young and old alike. Which is why in our 7th and final step tomorrow, we’ll be sharing tips on how to help promote your book to help get it into as many hands (and hearts) as possible …